Introduction:
The phrase "responsive web design" did not exist too long ago. But most of us have got to accept it to some degree today. Sixty-one percent of Google search visits happen on mobile devices as of 2019, according to Statistica. Google will favour websites that are mobile-friendly in its search algorithm beginning in September 2020.
Describe responsive web design.
A technique that focuses on the environment of someone using a Website optimization is called Adaptive layouts for the web. Depending on the device the user has connected to the internet, the environment will change. A variety of smartphones offer opportunities for a user-centric design. Amongst these are some of them:
- Screen sizes
- Interaction style (trackpads, touch displays)
- Network connection.
- Resolution of the graphics.
Many businesses used to operate a completely different Website optimization that received traffic that was redirected depending on the visitor's agent before web designs that were responsive became common.
But Adaptive layouts use CSS to modify how the page appears on different devices, but the server constantly delivers the same HTML source code to every device. Making the browser understand the goal is the first step in developing an internet page for a tablet or smartphone, no matter which of the two techniques mentioned above. This is the situation in which the viewport meta tag is used.
Using the viewport meta tag to recognize a mobile website:
The browser is told how to adapt the Website optimization to the width of every screen by the meta viewport tag. Mobile browsers will show websites using desktop settings by default if the meta viewport component is not available. It makes the experience feel unresponsive and stretched out.
CSS Media Questions for Various Orientations and Screen Sizes:
Media queries are the first and most important CSS element to understand when you're new to designing responsive websites. Some of you can style elements to match the viewport width with media queries. Creating mobile elements first before layering a more intricate desktop-specific style on top of them is an established CSS approach. A crucial component of responsive web design, media query queries are frequently used for grid designs, font sizes, borders, and spacing that change depending on the orientation and screen size of the user.
Here's an example of a usual application case for mobile first styling: a column that is 50% wide in larger viewports yet 100% wide on smaller screens.
Although the code given is a basic example, it does several equally interesting things. The "column" section is set to 100% width when analysing mobile devices first. We then use a min-width multimedia query to specify rules that are only applicable to viewports that have a maximum width of 600 pixels (viewports wider than 600 pixels).
Although numerous additional new CSS capabilities are also being widely accepted and supported in web browsers, media queries nevertheless remain an essential part of responsive web design. One of these fresh and important CSS elements for Adaptive layouts is flexbox.
Responsive Images:
Modern image tag properties allow us to use a variety of resolutions and devices. Here's an illustration of a responsive image.
This is doing multiple kinds of things. Let's examine it:
- The image can be scaled upward or downward according to its container width if max-width: 100% is set.
- We are actually just creating one image and downloading the best-fitting image according to the user's device by combining the picture, the source, and the img tags.
- A modern picture format called WebP offers greater compression for pictures sent to the internet. We may utilise the source element to point to a PNG representation of the images for non-WebP-compatible browsers and the sources tag to refer to a WebP image for browsers that support it.
- The browser is instructed which picture to use according to the resolution of the device using src set.
- Using the loading="lazy" property/value pair, we create native loading that is lazy.
Responsive Video:
Another topic that has sparked a lot of papers and research is responsive video.
On internet pages, responsive videos change in size without altering the aspect ratio. Videos that are responsive automatically adjust in size to fit the available space of the player while preserving the aspect ratio of the original video file.
To optimise images and video on tablets and mobile devices, there is still more we can do. In addition to this, we suggest conducting an independent study on those in question.
Tools for Responsive Website Monitoring and Simulation:
A wide variety of helpful tools are available that can help us develop websites, like responsive web design.
A variety of tablet and smartphone emulations can be downloaded through Chrome's DevTools. In addition, it has a "responsive" option that lets you specify an individual viewport size.
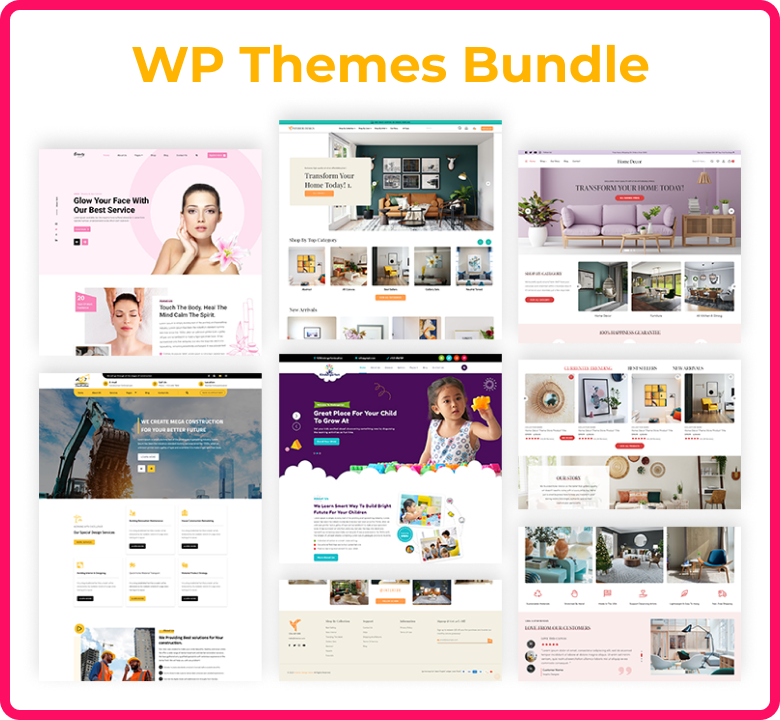
Describe WordPress Custom Theme:
A custom WordPress template is created especially for the needs of your business, and it has a distinctive look, appearance, and feature set. Although there are a multitude of premium as well as free WordPress templates available, a custom theme gives your company and business an individual look that makes it stand out.
Why would you customise the WordPress theme we're using:
The layout and add-ons. Let's begin with a crucial clarification following this first rundown of themes for WordPress and their functions. Customising a theme for a WordPress site entails making changes to its appearance and style. Using specialised plugins is preferable when you want to add functions to your website.
7 reasons for customising a WordPress theme:
Let's move on to a list of potential reasons for customising your WordPress theme. Ultimately, this isn't something that should be taken carelessly and impulsively. There are numerous potential reasons:
Customizing Your WordPress Website
- Enhancing Graphics: Customizing your WordPress theme can keep your site updated and attractive.
- Enhancing Readability and Accessibility: Customizing fonts, colors, and layout elements can improve readability and keep readers engaged.
- Differentiating Your Business: Matching the color scheme, font, logos, and visual components with your brand identity can boost your business's recognition.
- Improving User Experience: Creating an interface that meets the needs of your audience can enhance user experience and improve conversion rates.
- Improving Website Adaptability: Making it easier to read on all types of screens can improve website adaptability.
- Customizing Design: Programmers can create bespoke designs that match their vision, rather than settling for predefined themes.
- Modifying Website's Appearance for Specific Reasons: Customizing website elements can be done for specific events, like product launches or promotions.
Preserve your website:
Whether you edit the code or not, however, modifying many files is necessary when modifying your WordPress themes, especially if it's an extensive redesign (we'll get to this later). You can adapt and find free-of-anxiety remedies to any issue. All you need to do is put the website online after the work is finished. What are your choices for utilising an unfamiliar setting first, though?
Using your own computer for work locally is one of these main methods. "Local" is the name of one of the most widely recognised and useful tools for functioning locally.
What needs to be done in order to modify your WordPress theme?
Save your website. Whether you edit the code or not, however, altering many files is necessary when customising your WordPress themes, particularly when it's an extensive redesign (we'll get to this later).
Additionally, make an effort to backup both your database and your files. If something goes wrong (bug, technical issue, PHP and CSS error, etc.), you'll know that you can quietly fix your site and feel at ease again.
You have a few choices for backing up your website, including. Using a special plugin. In this test, we showcase several of them, most prominently UpdraftPlus. With UpdraftPlus, you're able to automatically backup your website and, in a sensible move, store the backups on a distant server. For the most part, the free trial version is sufficient. Website management software that allows backups and restores with only one click.
5 approaches for customising a WordPress theme:
Is the instrument available? Let's start with the conventional approach of theme customisation straight from the WordPress front office. It's the theme customizer, I mean.
You can gain access to it by selecting Appearance > Customise. Be careful. You massage your eyes in proximity to your screen. You make a page refresh. You pick something from each menu on your sidebar. However, nothing takes place. This customisation tool is not accessible to you. Don't fear; in certain situations, this is typical. Allow me to explain.
You need to use WordPress 5.9 or higher if you have a block-based theme (like Twenty Twenty-Three) and a version higher than 5.9. Alternatively, your site's "Appearance" menu will only have two submenus:
- Themes
- Editor
You can personalise a whole site with the WordPress Site Editor. Naturally, with the release of WordPress 5.9 and the inclusion of the Site Editor in the WordPress Core, the customisation tool has become illogical.
However, if your site is operating on a version below 5.9 (bad) or if it is operating on a version greater than 5.9 WITH a classic template (that is, one that isn't block-based), users will be able to access the Customisation Tool.Does everything make sense now? For instance, when you enable the Astra theme to function on WordPress 6.3, you can take advantage of the customisation tool. The "Appearance" menu will then have the following extra submenus:
How can you customise a theme for WordPress using the Site Editor?
Return to the WordPress dashboard now. Now let's examine Way #2: Using the Website Editor to Customise Your WordPress Theme. Just to be clear, let me clarify now. In order to benefit from this tool, you must:
- Have a WordPress version higher compared to or equal to 5.9
- Set the colour scheme to be block-based.
We're going to activate the complimentary Neve FSE theme from the Themeisle store in this instance. Go to Appearance > Themes to accomplish this.
Press the "Add" button. Next, choose "Neve FSE" from the list of "block-based themes" by dragging on it or by typing the following keyword into the search bar:
After setup, turn it on. If all goes according to schedule, your "appearance" menu will appear simpler and slightly shorter than it would be with a classic theme:
Click on Appearance > Editor to customise your theme.
This is the third way to customise a WordPress theme.
Actually, you might change your site's design with a page builder rather than just a theme. In concept, a page builder only works with the content area (yet, based on which version you're using, it may also work with the header and footer). Conversely, the footer and header templates are no longer in use.
Its dragging and dropping, real-time editing technique, and the variety of prepared-for-use page themes that it offers are what make it unique. How to use a page-building tool such as Elementor to customise a theme Make sure a page constructor is compatible with the theme itself before utilising all of its features.
You should have no issues there, as the great majority of them are. After enabling your preferred template on your website, make a page and begin modifying it. The following is a brief summary of what users can do: Give your page's different parts a structure, such as a container with columns.
Add content parts (referred to as "widgets" in Elementor) inside. They are located on the left side of the display on the side panel. All it takes to include them is dragging and dropping. Each part is able to be visually customised and then dropped anywhere on the page. Customise each widget's design and style to a high degree. Prepare to use a template, activate a page theme, or possibly the full website.
A decent page builder has more options for customisation and page designs than the WordPress Site Editor. Therefore, the newspaper's a better tool for newcomers, but be careful when drawing broad conclusions.
Even though the vast majority of users of website builders are not programmers and do not wish to learn how to use software, building visually appealing and unified sites still requires in-depth knowledge of web layout, user interfaces, and customer experience (UX).
Next up is Method 4: theme file editor customisation. This is a crucial technique to talk about since, given its availability on the management interface, using it is very enticing. It's at your fingertips, right there. Actually, when you use the file editor in WordPress, it alerts you. You are informed that using this method isn't recommended by a pop-up window:
Another time, avoid and refrain from using this technique. For the record, when you use a block-based theme and the WordPress theme editor appears to have vanished, this is the reason. Users can access a classic theme by going to Appearance > Theme File Editing.
The child theme case, Using a child theme is the recommended strategy when you want to modify a WordPress theme using code (when you have a theme that you originally downloaded and purchased from the website's official directory).
Making a child theme isn't always the ideal method, though, particularly if you've only recently started. In order to avoid breaking anything, you must not have less than an elementary knowledge of programming.
For instance, users can modify your theme for WordPress completely from your administrative interface without having to navigate the code found in a child theme when the theme itself is compliant with the Website Editor.
If you decide that making child themes is required, all you have to do is make modifications to the files that you have already placed in the directory of the newly created themes (by copying and pasting the contents of the parent theme file). This could include things like:
- css
- php
- the index.php file
- Etc
As we're talking about computer programming, let's have a final look at custom themes. In this scenario, if a developer is in control of theme updates, you may not even need a child theme. After that, you may modify the parent theme's code.
Conclusion:
The approach of responsive web design utilises website optimisation to focus on the environment that users are in. It entails utilising CSS to change the page's appearance across a range of devices, taking into account factors like graphics resolution, network connectivity, screen sizes, and interface styles. Adaptive designs make the browser comprehend the purpose of the website by using CSS to adjust the optimization according to the width of each screen. The first and most crucial CSS feature to fully understand when developing responsive website designs is media queries. Responsive movies immediately resize without changing their aspect ratio, while responsive photos can be resized up or down based on their frame width. Lighthouse and Chrome DevTools are tools for monitoring and simulating responsive websites, as are WordPress themes.
A WordPress theme can be modified in five different ways: Customise a theme: Choose Appearance > Customise to open the theme customizer. Anyone can customise your website using the WordPress Site Builder if it is a block-based design and it is version 5.9 or later. The Customisation Tool might not be readily available though, if your website is using a version of WordPress that is less than 5.9 or if it uses an older design.
Website Editor: In the event that you have a WordPress version greater than 5.9, use the Website Editor to customise your theme by setting the colour scheme to block-based.
Page builder: By simply dropping and dragging content components, you can alter a theme using a page builder such as Elementor. Nevertheless, it necessitates an in-depth awareness of user interfaces, web layout, and customer experience.