Today, the education system has secured miles in delivering the best assets, leading to more literacy. The reason? Online education. It has become a perfect way for online tutors, educators, and institutes who wish to expand their teaching reach. Education websites play a primary role through which students find it easier to grasp concepts, and even teachers find it an ideal way of connecting with students. In short, online education has transformed the way we learn, teach, and share knowledge.
Whether you're a subject matter expert, a growing training company, or a school looking to expand your reach, the ability to deliver courses online is no longer a luxury; it's a necessity. But here’s the challenge: many aspiring course creators look at clunky, expensive, or overly complex platforms and feel immediately overwhelmed. They worry about losing control of their content, getting trapped by high monthly fees, or being limited by rigid design templates.
The solution? Building your own Learning Management System (LMS) website using the world's most popular Content Management System: WordPress, specifically by utilizing premium WordPress themes In this complete guide, you’ll learn how to create an LMS website with WordPress, from choosing the right hosting and theme to setting up courses, quizzes, and payment gateways.
What is an LMS website?
An LMS website (Learning Management System website) is an online platform designed to create, manage, deliver, and track educational courses or training programs. It provides a centralised space where instructors can upload learning materials, organise lessons, assess student progress, and interact with learners all in one place.
Simply put, an LMS website allows educators, coaches, or organisations to teach and train online. Learners can sign up, access courses, watch videos, take quizzes, download resources, and even earn certificates upon completion.
Why Create an LMS Website?
Creating an LMS website offers powerful advantages for educators, trainers, and businesses looking to expand their reach and impact. Online learning is no longer a trend; it’s a necessity. Here’s why building your own LMS platform can be a game-changer:
- Reach a Global Audience: An LMS website breaks geographical barriers, allowing you to share your knowledge with learners around the world. Anyone with internet access can join your courses anytime, anywhere.
- Generate Passive Income: Once your courses are set up, they can generate continuous revenue with minimal maintenance. You can sell individual courses, memberships, or subscriptions to create a steady income stream.
- Brand Authority and Credibility: Hosting your own LMS website positions you as an expert in your field. It strengthens your brand identity and builds trust with your audience.
- Total Control Over Content and Pricing: Unlike third-party platforms such as Udemy or Skillshare, your LMS website gives you full control over your content, pricing, and student data, ensuring your business runs on your terms.
- Flexible Learning Experience: You can design your courses to fit your teaching style, whether through video lessons, quizzes, downloadable materials, or live sessions. This flexibility helps you engage learners more effectively.
- Scalability and Growth: As your student base grows, your LMS website can easily expand. You can add new courses, instructors, or learning paths without rebuilding the platform from scratch.
How to Create an LMS Website?
Creating an LMS website with WordPress can be easier than you might think. With the right tools and approach, you can launch a fully functional online learning platform without any coding skills. Here is the complete process to create your LMS WordPress website, organised into five major phases:
Step 1: Choose a Domain and Hosting Provider

Before you create an LMS website, it needs two essential components: a domain name and a hosting service. These are the backbone of every website and determine how your site appears and performs online.
Domain Name: Your domain name is your website’s online address. It’s how learners and visitors recognise and access your brand on the internet. Common domain extensions include “.com,” “.org,” “.co,” or regional ones like “.in.” Without a domain, your website can’t have a unique identity on the web.
When selecting a domain, try to use your brand name or something simple, memorable, and relevant to your niche. Keep it short and easy to spell. You can register a domain through trusted providers such as GoDaddy, Namecheap, or Bluehost. Choosing the right domain name sets the tone for your brand and helps users find you easily.
Web Hosting: If your domain is your website’s address, hosting is its home. It’s where all your website’s data, files, and content are securely stored and delivered to visitors when they access your site. A good hosting service ensures your website runs smoothly, loads quickly, and remains accessible around the clock.
When choosing a WordPress-compatible hosting provider, look for:
- High uptime (so your site stays online)
- Fast performance and reliability
- Strong security features
- Responsive customer support
- Compatibility with WordPress themes and plugins
Some of the most popular and reliable hosting companies include Bluehost, HostGator, SiteGround, and GoDaddy. Select a plan that fits your needs and budget, whether you’re just starting or planning to scale your online learning platform.
Once your domain and hosting are ready, you can proceed with installing WordPress and begin to create an LMS website with confidence.
Step 2: Install WordPress

Once you’ve chosen Bluehost as your hosting provider, setting up WordPress is quick and beginner-friendly. WordPress.org officially recommends Bluehost and offers a one-click WordPress installation, making the entire process effortless.
After purchasing your hosting plan, log in to your Bluehost dashboard using the credentials sent to your registered email. From here, you can manage your domains, emails, and WordPress installation all in one place.
- Go to your Bluehost control panel.
- Under the “Website” section, click Install WordPress.
- Choose the domain where you want to install WordPress.
- Fill in your site name, admin username, and password.
- Click Install.
Bluehost will automatically handle the setup, database creation, and configuration for you.
Step 3: Choose and Customise an LMS WordPress Theme

You’ve completed the foundational steps to create an LMS website, selecting a reliable hosting service, registering your domain, and installing WordPress. Now comes one of the most exciting yet challenging parts: choosing the perfect theme for your website.
With thousands of WordPress themes available, finding the one that fits your online learning vision can feel overwhelming. The right theme should not only look appealing but must also support the core LMS functions, which are often provided by must use wordpress plugins for tasks like creating online courses, adding quizzes, managing students, and organising learning materials seamlessly.
In short, your theme should reflect the purpose of your e-learning platform while offering flexibility, performance, and compatibility with your chosen LMS plugin.
Out of many platforms selling top-tier e-learning themes, we highly recommend using the Theme Ignite themes. And let me tell you that this platform has a perfect theme, the LMS Education WordPress theme. The ThemeIgnite platform specialises in providing professionally designed WordPress themes that are specifically created or optimised to function as the visual front-end for a robust Learning Management System (LMS) website. Their focus is on offering themes that are lightweight, customizable, and, critically, compatible with popular third-party LMS plugins.
Out of so many themes on ThemeIgnite, we have chosen the eLearning WordPress Theme.
1. E-learning WordPress Theme

The eLearning WordPress Theme from ThemeIgnite is designed to provide the ideal visual and functional layer for a learning management system built on WordPress. This theme moves beyond a standard blog or business theme to specifically address the unique structural and user experience needs of an online educational platform.
The theme is explicitly designed to integrate seamlessly with major, often free, LMS plugins like LearnPress and may also be compatible with others like Tutor LMS or LifterLMS. It offers a modern, professional, and often minimalist design that establishes credibility and minimises visual clutter, allowing the student to focus entirely on the course content. The actual lesson view pages are typically designed to be minimal, keeping navigation, sidebars, and widgets away from the main video or text content. Since many students use phones or tablets, the theme is fully responsive, ensuring video players, quizzes, and text look and function perfectly on any screen size. It is typically a customizable WooCommerce theme meaning you can install the WooCommerce plugin to handle complex transactions, coupons, and tax calculations seamlessly. It often includes compatibility with popular drag-and-drop page builders like Elementor or Gutenberg, allowing for easy customisation without needing to code. The eLearning WordPress Theme by ThemeIgnite is a very strong contender if you’re building an LMS website using WordPress. It’s built with the right audience in mind: online courses, education, and interactive learning. It supports the core needs of LMS and offers customisation, performance, and branding options.
2. Education WordPress Theme

The Education WordPress Theme from ThemeIgnite is a comprehensive and flexible solution designed to build an effective education WordPress website for educational institutions, training centers, and e-learning platforms. It offers a clean, professional layout that supports various learning modalities, from traditional classroom courses to online, distance, and self-paced education. With dedicated sections for courses, classes, tutors, events, and educational resources, the theme enables administrators and educators to present their programs, schedules, and curricula in a clear and structured way.
On the technical side, the theme provides powerful customization options through the WordPress Customizer, allowing you to change global colours, fonts, and layouts without touching code. It's also lightweight and performance-optimized to ensure fast loading times, and its responsive design guarantees a smooth experience on desktops, tablets, and mobile devices. Teachers and administrators can leverage the theme to deliver content, host seminars or webinars, and manage workshops or coaching programs, making it a robust foundation for any educational website.
Step 4: Install and Configure the E-Learning WordPress Theme
Since you've already completed the hosting and WordPress installation steps, here is the streamlined process to create an LMS website:
- Log in to your ThemeIgnite account dashboard.
- Find the "E-learning WordPress Theme" and download the main theme package. It should be a single compressed .zip file.
- Next, log in to your WordPress Admin Dashboard.
- Go to Appearance and then Themes.
- Click the "Add New" button at the top, and then click "Upload Theme."
- Click "Choose File," locate the .zip file you downloaded in Step 1, and click "Install Now."
- Once WordPress successfully uploads and installs the theme, you will see a success message.
- Click the "Activate" link to apply the theme to your live website.
To make it more professional, you can customise your theme according to your taste. This is how you can customise the E-learning WordPress theme:
- Log in to your WordPress dashboard.
- Go to Appearance > Customise.
- This will open the WordPress Live Customizer, where you can preview changes in real time.
- Here, you’ll find customisation options like Site Identity (Logo, Title, Tagline, and Favicon), Colours and Typography, Header and Footer Settings, Homepage Layout, Menus, and Widgets.
- Your website should reflect your educational brand—so start with visuals:
- Logo: Upload your brand logo under Site Identity → Logo.
- Site Title and Tagline: Update these to reflect your institution or e-learning brand.
- Favicon (Site Icon): Add a small logo for the browser tab to enhance brand recognition.
- To create a professional and consistent learning environment: Navigate to Colours to set your primary and accent colours. Go to Typography to choose fonts for headings, body text, and buttons.
- The E-Learning Theme usually comes with a prebuilt homepage layout for educational websites. Go to Homepage Settings → choose Static Page. Set your Home Page and Blog Page.
- You can make navigation easier by creating menus. Go to Appearance > Menus.
- Create a new menu (e.g., Main Menu). Add key pages such as Home, Courses, About, Contact, and Dashboard/Login. Assign this menu to the Primary Menu location.
- Since the theme is designed to work with an LMS plugin, some important styling will be controlled by the LMS plugin settings. For this guide, we will use the Tutor LMS plugin.
- Unfortunately, the required plugin doesn’t come pre-installed with the theme, so you’ll need to add it manually.
- To do this, go to your WordPress Dashboard and navigate to the Plugins section. You’ll see a list of plugins already installed on your site. To add a new one, click the Add New button located at the top of the page.
- In the search bar, type Tutor LMS, and when it appears in the results, click Install Now. Once the installation is complete, select Activate to enable the plugin on your website.
- With the Tutor LMS plugin and your theme now properly installed, you’re ready to move forward and start configuring your e-learning platform.
Step 5: Create Online Courses

Once you’ve installed the Tutor LMS plugin, the next step is to configure its settings to suit your e-learning platform’s needs.
- Access Tutor LMS Settings :
Go to your WordPress Dashboard → Plugins.
Find Tutor LMS in the list and click on the Settings link below it.
- Explore the Settings Options :
You’ll find five key sections to configure within the Tutor LMS settings panel:
- General Settings – Control overall site behaviour and preferences.
- Course Settings—Manage course creation, layout, and access options.
- Monetisation—Set up payment methods and enable course selling features.
- Design—Customise how your course pages appear.
- Advanced Settings – Fine-tune technical or performance-related options.
You can adjust each section as per your site’s requirements. When finished, your LMS foundation will be ready to start adding content.
- Create Your First Course :
- From the WordPress Dashboard, go to Tutor LMS > Courses.
- Click on Add New to create a new course.
- Enter a course title, description, and any other relevant details such as difficulty level, duration, and featured image.
- Customise additional options like course prerequisites or target audience.
- Once you’re satisfied, click Publish to make the course live on your website.
- You can repeat this process to build multiple courses quickly and easily.
- Upgrade for Advanced Features: The free version of Tutor LMS allows you to create basic online courses. However, upgrading to the Pro version unlocks advanced tools such as quizzes, assignments, certificates, and in-depth analytics, perfect for a more interactive e-learning experience.
- Enable Course Sales with WooCommerce: If you plan to monetise your courses, integrate WooCommerce with Tutor LMS. This allows you to accept payments securely via popular gateways such as PayPal, Stripe, and others.
Step 6: Set up Payment Gateways

Once your LMS website is ready and courses are published, the next essential step is to set up payment gateways so students can pay for courses securely. Payment gateways enable you to accept payments directly on your site using debit cards, credit cards, digital wallets, or bank transfers.
WordPress LMS platforms like Tutor LMS, LearnDash, and LifterLMS usually integrate with WooCommerce, a free eCommerce plugin that manages all your transactions smoothly.
- Go to your WordPress Dashboard → Plugins → Add New.
- In the search bar, type WooCommerce.
- Click Install Now, and then Activate.
WooCommerce acts as the financial backbone of your LMS website, helping you manage payments, refunds, and order tracking.
WooCommerce supports a variety of payment gateways.
To access them:
- Go to WooCommerce → Settings → Payments.
- You’ll see a list of available options such as PayPal Standard / PayPal Checkout, Stripe, Direct Bank Transfer, and Razorpay.
- Toggle Enable next to your preferred gateways.
Click Set up beside each option to configure details.
Let’s look at how to configure Stripe, one of the most popular and secure gateways.
- Click Set up beside Stripe.
- You’ll be asked to connect your Stripe account. If you don’t have one, create it at https://stripe.com.
- Once connected, WooCommerce will automatically sync your API keys.
- Enable options like Test Mode (for trial payments) and Live Mode (for real transactions).
- Click Save Changes.
- Your site can now accept credit and debit card payments globally.
In this way, you can set up multiple payment gateways on your LMS website.
Step 7: Optimise for Speed and Performance

A well-optimised site attracts more students.
- Use Yoast SEO or Rank Math for on-page SEO.
- Compress images and enable caching with plugins like WP Rocket or LiteSpeed Cache.
- Ensure your site is mobile-friendly and loads fast.
Step 8: Test and Launch Your Website

Before going live, test every element:
- Enrol as a student to check the registration and payment process.
- Review course layouts and quiz functions.
- Fix any design or navigation issues.
Once everything runs smoothly, publish your site and start promoting it!
Conclusion
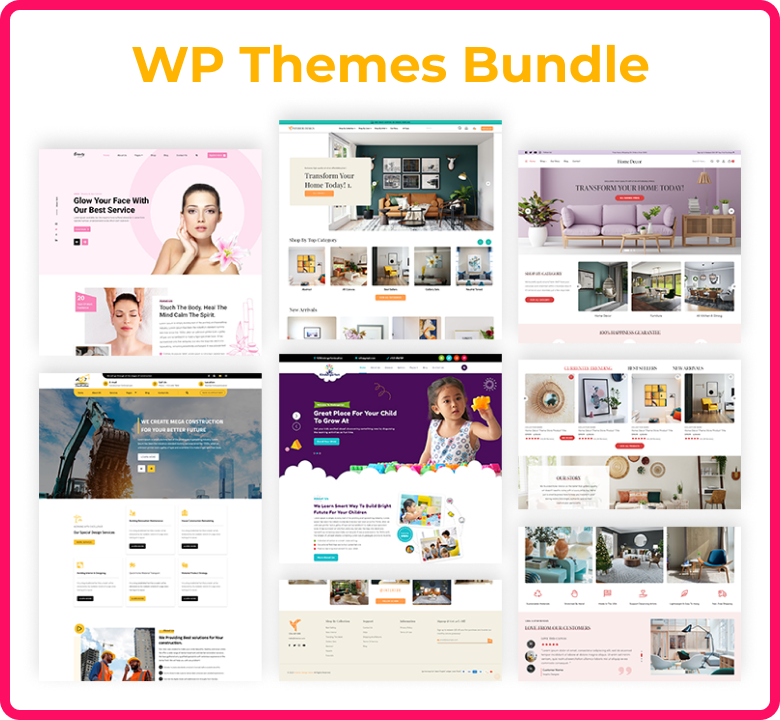
To create an LMS website with WordPress, you need the above guide, which outlines every step for your convenience. It is an effective way to bring education online and connect with learners across the globe. By starting with a comprehensive WP theme bundle along with the right domain, hosting, LMS plugin, and payment integration, you can create a powerful e-learning platform that is both functional and engaging.
WordPress makes this process incredibly flexible, allowing you to design interactive courses, manage students, track progress, and even monetise your educational content effortlessly. Whether you’re an individual instructor, a coaching centre, or an educational institute, your LMS website can serve as a virtual classroom that never closes.
As online learning continues to grow, investing time in creating your own LMS website will help you build credibility, reach a wider audience, and make a lasting impact through education. Start small, customise as you go, and watch your e-learning platform evolve into a thriving online community of knowledge.